
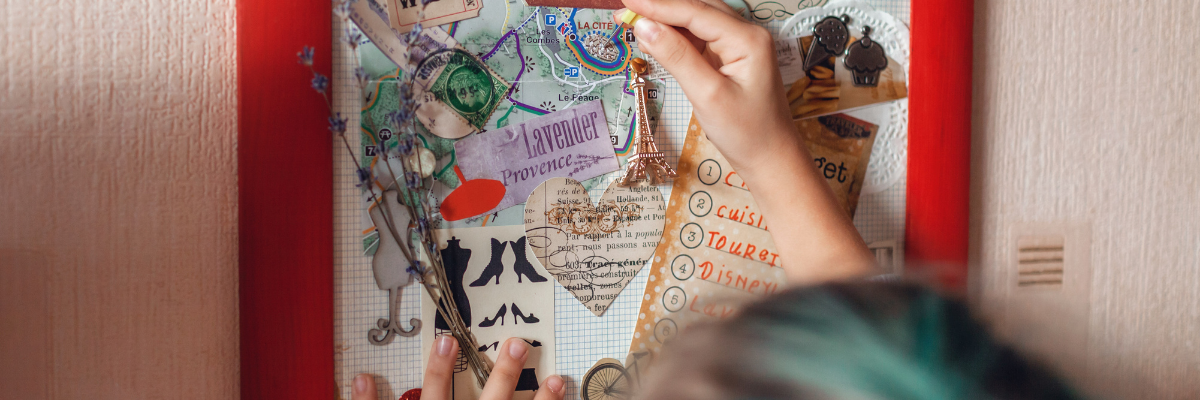
Ever feel like your style is a bit…scattered? Like you know what you like, but can’t quite translate that into a cohesive look for your home, your wardrobe, or even your career? That’s where a mood board comes in. It’s a powerful visual tool that helps you define and refine your aesthetic, bringing clarity to your creative vision and turning abstract ideas into tangible inspiration. Let’s dive into creating a mood board that truly reflects you.
Why Bother with a Mood Board? Is it Really Worth the Effort?
Absolutely! Think of a mood board as the ultimate brainstorming session, but instead of just words, you’re using images, textures, and colors. It helps you:
- Clarify Your Vision: Sometimes, you just feel what you want, but putting it into words is tricky. A mood board allows you to express those feelings visually.
- Stay Focused: Ever get sidetracked by the latest trends? A mood board acts as a compass, guiding you back to your core aesthetic.
- Communicate Effectively: Sharing your vision with others (designers, stylists, friends) becomes so much easier when you have a visual reference point.
- Unleash Creativity: The act of curating and arranging visuals can spark new ideas and connections you might not have discovered otherwise.
- Avoid Costly Mistakes: By solidifying your style beforehand, you’re less likely to make impulse purchases you’ll later regret.
Okay, I’m Sold! But Where Do I Even Start?
The beauty of a mood board is that there are no hard and fast rules. It’s all about what works for you. However, here’s a step-by-step guide to get you started:
1. Know Thyself (and Your Project!)
Before you even think about images, take some time for introspection. Ask yourself:
- What’s the purpose of this mood board? (Home decor, wardrobe revamp, branding for your business, etc.)
- What feeling am I trying to evoke? (Cozy, sophisticated, energetic, calming?)
- What are my core values and how can they be reflected in my style? (Sustainability, minimalism, boldness?)
- What are my absolute must-haves? (Specific colors, textures, or items you know you want to incorporate.)
- What are my deal-breakers? (Things you absolutely dislike or want to avoid.)
Answering these questions will provide a solid foundation for your visual exploration.
2. Gather Your Inspiration Arsenal: It’s Time to Hunt!
Now for the fun part! Start collecting images, textures, and anything else that resonates with you. Don’t overthink it at this stage; just gather anything that catches your eye.
- Online Resources:
- Pinterest: The undisputed queen of visual inspiration. Create dedicated boards for specific aspects of your project.
- Instagram: Follow accounts that align with your aesthetic. Save posts that inspire you.
- Websites: Browse blogs, online magazines, and e-commerce sites related to your project.
- Color Palette Generators: Sites like Coolors or Adobe Color can help you discover and refine your color schemes.
- Offline Resources:
- Magazines: Tear out pages from magazines that feature inspiring images, colors, or textures.
- Fabric Swatches: Collect fabric samples from your local fabric store.
- Paint Chips: Gather paint chips in your desired color palette.
- Physical Objects: Include small objects that represent your style (a favorite piece of jewelry, a dried flower, a postcard).
Pro Tip: Don’t be afraid to go beyond literal interpretations. A picture of a sunset might inspire a color palette, or a photo of a vintage car might inspire a sense of timeless elegance.
3. Curate, Curate, Curate: Less is Definitely More
Once you’ve gathered a mountain of inspiration, it’s time to start editing. This is where you’ll refine your vision and create a cohesive mood board.
- Identify Common Themes: Look for recurring colors, textures, shapes, and patterns.
- Eliminate the Noise: Remove anything that doesn’t align with your core vision or feels out of place.
- Focus on the Essentials: Aim for a curated collection of images that truly represent your aesthetic.
- Consider the Hierarchy: Think about which elements are most important and give them more prominence on your board.
4. Choosing Your Medium: Digital vs. Physical – Which One’s Right for You?
You have two main options for creating your mood board: digital or physical. Each has its own advantages and disadvantages.
Digital Mood Boards:
- Pros:
- Easy to Edit: You can easily add, remove, and rearrange elements.
- Shareable: You can easily share your mood board with others.
- Accessible: You can access your mood board from anywhere with an internet connection.
- Environmentally Friendly: No physical materials are required.
- Cons:
- Can Feel Less Tangible: Some people find it harder to connect with a digital mood board.
- Distractions: You might get distracted by other things online.
Popular Digital Tools:
- Pinterest: While great for gathering, it can also be your mood board.
- Canva: A user-friendly design platform with pre-made mood board templates.
- Adobe Photoshop or Illustrator: For more advanced users who want complete control over the design.
- Milanote: A visual workspace designed specifically for creative projects, including mood boards.
Physical Mood Boards:
- Pros:
- Tactile Experience: You can physically touch and feel the materials.
- More Engaging: Some people find it easier to connect with a physical mood board.
- Less Distractions: You’re less likely to get distracted by other things.
- Cons:
- Less Flexible: It’s harder to edit and rearrange elements.
- Not Easily Shareable: Sharing a physical mood board can be challenging.
- Requires Physical Materials: You’ll need to gather and purchase materials.
Materials for a Physical Mood Board:
- Backing Board: Corkboard, foam board, or a large piece of cardboard.
- Adhesive: Glue sticks, tape, or pushpins.
- Scissors or a Craft Knife: For cutting out images and materials.
5. Arranging Your Elements: Creating Visual Harmony
Whether you’re working digitally or physically, the arrangement of your elements is crucial.
- Balance: Aim for a visually balanced composition. Distribute the elements evenly across the board.
- Hierarchy: Place the most important elements in prominent positions.
- Color Harmony: Ensure that the colors work well together and create the desired mood.
- Texture: Incorporate different textures to add depth and interest.
- Negative Space: Don’t overcrowd the board. Allow for some negative space to give the eye a place to rest.
Pro Tip: Experiment with different arrangements until you find one that feels right. There’s no right or wrong way to do it!
6. Live With It (and Tweak as Needed!)
Your mood board isn’t set in stone. Live with it for a few days and see how you feel. Do you still love it? Does it still accurately reflect your vision? Don’t be afraid to make changes as you go.
Frequently Asked Questions (Because We Know You Have Them!)
- How long should it take to create a mood board? It depends on the scope of your project, but allow yourself a few hours over a couple of days. Don’t rush the process!
- How many images should I include? There’s no magic number. Focus on quality over quantity. Aim for a curated collection of 10-20 images.
- Do I need to be a designer to create a mood board? Absolutely not! Anyone can create a mood board. It’s a tool for anyone who wants to clarify their visual vision.
- What if I don’t have a clear style? That’s okay! A mood board can help you discover your style. Start by gathering images that you like and see what common themes emerge.
- Can I use someone else’s images on my mood board? For personal use, yes. But if you’re using it for commercial purposes, make sure you have the rights to use the images.
Ready to Get Started?
Creating a mood board is a powerful way to unlock your creative potential and bring your vision to life. So, gather your inspiration, embrace the process, and let your inner designer shine! Now go forth and create a visual masterpiece that truly speaks to you.